Wednesday, May 30, 2018

Oracle Bot Cloud (IBCS): Voice based coversation

Problem Description: In this blog we are trying to enhance our web chatbot ui created in previous blog and add voice features.

Idea here is to send text message to Bot and receive only text messages but before sending convert user voice (speech) to text and again when we receive and message from bot server play it as audio.

There are few options available to convert voice and text. In this blog we are going to use
1. Speech to Text:  webkitSpeechRecognition api of browser
2. Text to Speech: speechSynthesis api of browser

Lets take our previous chatbot UI created in blog http://sanjeev-technology.blogspot.com/2018/05/oracle-bot-cloud-ibcs-custom-ui.html and enhance it for voice support.

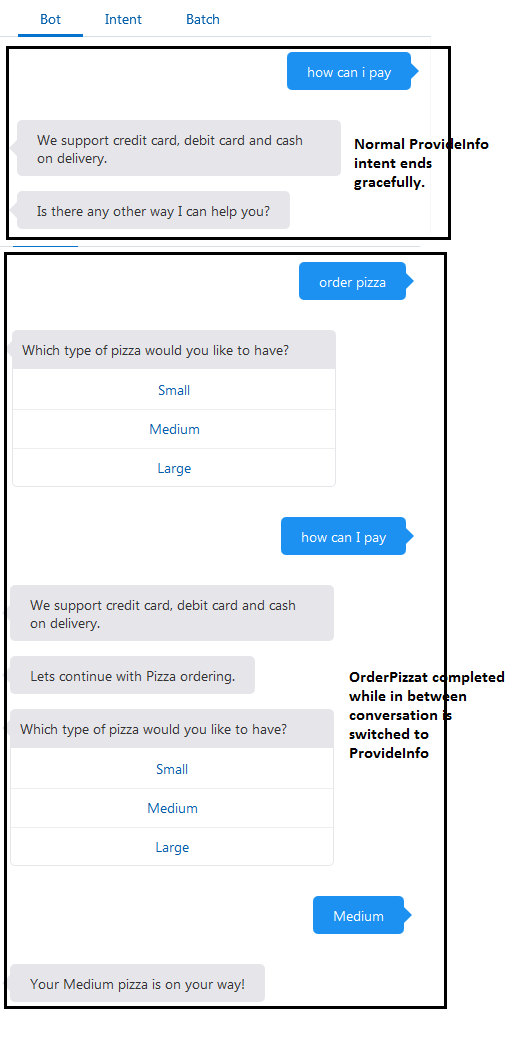
Now we can follow below steps
1. Add a button to initiate voice chatting
<oj-button id="start_button" on-oj-action="[[startVoiceChat]]">Start Voice Chat</oj-button>
Now add corresponding code in appcontroller.js
self.startVoiceChat = function(event){
        listenUserVoice();
      }

NOTE: I am using oracle jet so I use oj-button. Point is we have to call listenUserVoice method on button click.

2. Add speak method in app.js. This method will provide audio to text message. It will also callback once meassage reading is finished.

function speak(text, onendcallback){
    var msg = new SpeechSynthesisUtterance();
     msg.text = text;
     if(onendcallback){
        msg.onend = onendcallback;
     }
     window.speechSynthesis.speak(msg);

     console.log(JSON.stringify(msg));;
  }

3. Add listenUserVoice method also in app.js. This method reconizes user voice and converts it to text. It also calls bots sendmessage or triggerpostback depending on situation.

function listenUserVoice(){
    var recognition = new webkitSpeechRecognition();
            recognition.continuous = false;
            recognition.interimResults = true;

            recognition.onstart = function() {
                recognizing = true;
            };

            recognition.onend = function() {
                recognizing = false;
            };

            recognition.onresult = function(event) {
                console.log("recognition-onresult" + event);
              console.log(event);

              var interim_transcript = '';
              if (typeof(event.results) == 'undefined') {
                recognition.onend = null;
                recognition.stop();
                upgrade();
                return;
              }
              for (var i = event.resultIndex; i < event.results.length; ++i) {
                if (event.results[i].isFinal) {
                  final_transcript += event.results[i][0].transcript;
                } else {
                  interim_transcript += event.results[i][0].transcript;
                }
              }
              

              if(final_transcript){

                console.log("User said: " + final_transcript);
                var totalMsg = Bots.getConversation().messages.length;
                if(Bots.getConversation().messages[totalMsg-1] && Bots.getConversation().messages[totalMsg-1].actions){
        
                var actions = Bots.getConversation().messages[totalMsg-1].actions.filter(function(action){
                    return action.text === final_transcript; //Improve it by performing case insensitive matching
                })
                if(actions && actions[0]){
                    Bots.triggerPostback(actions[0]._id).then(function() {
                                console.log("postback");
                            });
                }
                
                }
                else{
                   Bots.sendMessage(final_transcript).then(function() {
                            console.log("normal message");
                        }); 
                }

                
                if(final_transcript){
                  recognizing = false;
                }
                

            }
            }

            if (recognizing) {
              recognition.stop();
              return;
            }
            final_transcript = '';
            recognition.start();

        }
  
4. Now modify displayServerMessage method to call listenUserVoice method so that system automatically starts taking user message after providing any information.

function displayServerMessage(message) {
         console.log(message);
            var conversationElement = document.getElementById('conversation');
            var messageElement = document.createElement('li');
            var text = 'Server says "' + message.text + '"';
            messageElement.innerText = text;

            if(message.actions && message.actions.length > 0){
                var wrapperElement = document.createElement('div');
                for(var i = 0; i < message.actions.length; i++){
                    var action = message.actions[i];
                    var btnElement = createButtonElement(action);
                    wrapperElement.appendChild(btnElement);
                }
                messageElement.appendChild(wrapperElement);
                
            }
            conversationElement.appendChild(messageElement);


            speak(text, listenUserVoice);
        }

Thats all.

Oracle Bot Cloud (IBCS): Custom UI

Problem Description: In this blog I would be going over various options to build a web UI for IBCS chat bot.

By default IBCS provides two sdks to build web UI for Chatbot. We can download those sdks from
http://www.oracle.com/technetwork/topics/cloud/downloads/mobile-suite-3636471.html under heading Bots Client SDK


We can follow link https://docs.oracle.com/en/cloud/paas/mobile-suite/use-chatbot/bot-channels.html#GUID-A0A40E26-54BA-4EDD-A4C5-95D498D6CF61 to find out how to use these SDKs.


Widget is very cool and rich but still at times you want to build your own custom UI instead of widget. To do that you can follow
https://docs.oracle.com/en/cloud/paas/mobile-suite/use-chatbot/bot-channels.html#GUID-78F6DD7E-5085-476B-AD03-1318D9107D39

In this blog I am trying to enhance that code to handle postback requests. Also this blog will help me in my next blog to achieve voice based conversation.

1. Add below code in html
HTML:
 <div id="no-display" style="display:none;"></div>
       <p>User ID: <span id="user-id"></span></p>
       <ul id="conversation"></ul>
    <input type="text" id="text-input" placeholder="text">

<script src="js/app.js"></script>


2. Add app.js inside js directory. It can have following code
!function(e,t,n,r){
    function s(){try{var e;if((e="string"==typeof this.response?JSON.parse(this.response):this.response).url){var n=t.getElementsByTagName("script")[0],r=t.createElement("script");r.async=!0,r.src=e.url,n.parentNode.insertBefore(r,n)}}catch(e){}}var o,p,a,i=[],c=[];e[n]={init:function(){o=arguments;var e={then:function(t){return c.push({type:"t",next:t}),e},catch:function(t){return c.push({type:"c",next:t}),e}};return e},on:function(){i.push(arguments)},render:function(){p=arguments},destroy:function(){a=arguments}},e.__onWebMessengerHostReady__=function(t){if(delete e.__onWebMessengerHostReady__,e[n]=t,o)for(var r=t.init.apply(t,o),s=0;s<c.length;s++){var u=c[s];r="t"===u.type?r.then(u.next):r.catch(u.next)}p&&t.render.apply(t,p),a&&t.destroy.apply(t,a);for(s=0;s<i.length;s++)t.on.apply(t,i[s])};var u=new XMLHttpRequest;u.addEventListener("load",s),u.open("GET",r+"/loader.json",!0),u.responseType="json",u.send()
}(window,document,"Bots", "<Your-Bot-sdk-url>");

var appId = '<Your app id>';

Bots.init({
        appId: appId, embedded: true
    }).then(function (res){
        console.log("init complete");

    });

Bots.render(document.getElementById('no-display'));


var inputElement = document.getElementById('text-input');
  inputElement.onkeyup = function(e) {
  if (e.key === 'Enter') {
    var totalMsg = Bots.getConversation().messages.length;
    if(Bots.getConversation().messages[totalMsg-1] && Bots.getConversation().messages[totalMsg-1].actions){
        
        var actions = Bots.getConversation().messages[totalMsg-1].actions.filter(function(action){
            return action.text === inputElement.value; //Improve it by performing case insensitive matching
        })
        if(actions){
            Bots.triggerPostback(actions[0]._id).then(function() {
                        inputElement.value = '';
                    });
        }
        
    }
    else{
       Bots.sendMessage(inputElement.value).then(function() {
                inputElement.value = '';
            }); 
    }
        
    }
   
  }


function displayUserMessage(message) {
    console.log(message);
            var conversationElement = document.getElementById('conversation');
            var messageElement = document.createElement('li');
            messageElement.innerText = message.name + ' says "' + message.text + '"';
            conversationElement.appendChild(messageElement);
        }

        function createButtonElement(action) {
            var btnElement = document.createElement('button');
            var btnTitle = document.createTextNode(action.text);
            btnElement.appendChild(btnTitle);
            btnElement.onclick = function(e){Bots.triggerPostback(action._id);};
            return btnElement;
        }

    function displayServerMessage(message) {
         console.log(message);
            var conversationElement = document.getElementById('conversation');
            var messageElement = document.createElement('li');
            var text = 'Server says "' + message.text + '"';
            messageElement.innerText = text;

            if(message.actions && message.actions.length > 0){
                var wrapperElement = document.createElement('div');
                for(var i = 0; i < message.actions.length; i++){
                    var action = message.actions[i];
                    var btnElement = createButtonElement(action);
                    wrapperElement.appendChild(btnElement);
                }
                messageElement.appendChild(wrapperElement);
                isPostBackRequired = true;
                lastPostBackServerMsg = message;
            }
            conversationElement.appendChild(messageElement);


        }
  // display new messages
  Bots.on('message:sent', displayUserMessage);

  Bots.on('message:received', displayServerMessage);


NOTE:
1. Bot-sdk-url is url of your sdk directory. If you copy bot-sdk inside js directory as bot-client-sdk-js and server is running on port 8000, your bot-sdk-url would be http://localhost:8000/js/bots-client-sdk-js
2. app-id mentioned in above code is given on channels page of IBCS (once you register a web channel)

3. Input element in which user types message is enhanced to handle postBack message of user.
4. displayUserMessage function adds user typed message in list
5. displayServerMessage function adds server message in list. It also create appropriate buttons if server wants user to select one value.

UI is very crude but it gives you complete control to decorate it.

Now we have a very basic UI ready. My idea is to enhance it further and add voice feature to it in my Next blog.

Thats all in this blog.

Wednesday, May 16, 2018

Oracle Bot Cloud (IBCS): Switching Intents while in conversation (Nested Intent)

Problem Description: If we see IBCS flow generally tries to find user intent first. Once it identifies and intent, it tries to complete intent based on flow defined. There are all reasons that end user may want to switch his intent before completing first intent. For example, I am ordering pizza but while system asks me for pizza type, I decide to verify their payment options and I changed my intent. Something like below

Me: I would like to order a pizza
       
                   Bot: Which type of pizza would you like to have?

Me: Hold on, What are your payment options
     
               
In ideal conversation bot should provide me details of payment. Once payment options information is provided, it can ask me if I want to continue with Pizza order.

But in general we use either System.Text or System.List component when we want to take user input. This is the time when user can change his mind (or intent).

It looks like
askPizzaType:
    component: "System.List"
    properties:
      options: "${pizzaType.type.enumValues}"
      prompt: "Which type of pizza would you like to have?"
      variable: "pizzaType"
    transitions: {}

with this state, bot will provide a list of pizza types (say small, medium or large). Now even if user changes his mind and asks about payment options, bot will ask pizza type again and again. Very annoying.

In this blog we want to make it a bit realistic and introduce intelligence of user intent switching.

Lets say we have following initial bot configuration

1. Intents: OrderPizza, ProvideInfo
2. Entity: PizzaType (Associated with OrderPizza Intent)

3. Dialog-Flow:

Its able to complete payment option enquiry and pizza order but if user tries to switch from OrderPizza intent to ProvideInfo, bot keeps on asking about pizza type as shown below


Now lets improve it to handle intent switching.
a. To stop bot asking for pizzaType repeatedly, we can introduce maxPrompts=1 with askPizzaType (System.List) component.

b. We can add cancel action with askPizzaType (System.List) component to perform a transition, if bot can't find pizzaType even after max number of attempts ( NOTE: here we have already set max attempt as 1, so user can only provide one input. If that is not small/medium/large, cancel transition will take place)
askPizzaType:
    component: "System.List"
    properties:
      options: "${pizzaType.type.enumValues}"
      prompt: "Which type of pizza would you like to have?"
      variable: "pizzaType" 
      maxPrompts: 1
    transitions: 
      actions:
        cancel: "verifyIntentWhileOrderPizzaInProgress"    

c. verifyIntentWhileOrderPizzaInProgress can set uncompletedIntent in a variable and then perform an nlp intent-matching on user input. If its unresolved in NLP matching assume that user is trying to answer pizzaType question but some typo etc happened so lets take him back to askPizzaType.

verifyIntentWhileOrderPizzaInProgress:
    component: "System.SetVariable"
    properties:
      variable: "uncompletedIntent"
      value: "OrderPizza"
    transitions: {}        
  verifyIntent:
    component: "System.Intent"
    properties:
      variable: "iResult2"
      confidenceThreshold: 0.4
    transitions:
      actions:
        OrderPizza: "orderPizza"
        ProvideInfo: "provideInfo"
        unresolvedIntent: "askPizzaType"

d. Lets improve provideInfo state as well to handle uncompleted intent (OrderPizza). After providing information of payment option, verify if there is any uncompleted intent. If yes suggest to continue with that intent else done
provideInfo:
    component: "System.Output"
    properties:
      text: "We support credit card, debit card and cash on delivery. "
      keepTurn: true
    transitions: 
       next: "isAnyIncompleteIntent"

e. Lets introduce few states to gracefully end conversation or ask for any pending intent completion.
  isAnyIncompleteIntent:
    component: "System.ConditionEquals"
    properties:
      variable: "uncompletedIntent"
      value: "OrderPizza"
    transitions:
      actions:
        equal: "askToStartPizzaOrderAgain"
        notequal: "done"  
  askToStartPizzaOrderAgain:
    component: "System.Output"
    properties:
      text: "Lets continue with Pizza ordering."
      keepTurn: true
    transitions: 
       next: "orderPizza"   
  done:
    component: "System.Output"
    properties:
      text: "Is there any other way I can help you?"
    transitions:
      actions:
       return: "done"

Complete flow looks like below

Effectively by above improvements in flow we are trying to enable user to switch intent while in between conversation.
After above change flow looks like this.
Thats all

Tuesday, May 15, 2018

Oracle Cloud Bot Designer UI URL

Problem Description: This blog is just to remind me how to find bot designer UI. I recently created a bot cloud service. It created lots of services and it was really hard for me to find bot designer UI url.

Finally I could find it as shown in below dig.


Wednesday, April 11, 2018

Java SOAP WebService Proxy: SOAPHandler to print SOAP messages

Problem: We all know about creating webservice proxy from jdeveloper. Proxy generates few classes based on WSDL and associated XSD and allow us to invoke webservice as if we are simply calling some java method. Complexity of creating soap message and sending over network and receiving output is hidden from us. One of the problem we face many a time is to view SOAP request and response messages. If we can it would be very helpful for debugging.
In this blog I will be using SOAP handler to view SOAP messages.

Solution: Solution which I am going to show is using SOAP handler feature of web-service proxy.

Using proxy is very simple, we just work with normal java classes and complexity of invoking webservice is completely hidden. SOAP Handler is java class (with some guidelines) that can be injected with proxy and proxy will make sure to call methods of this class before sending a request and after receiving message.

SOAP Handler class must implement SOAPHandler<SOAPMessageContext> class.
A Sample SOAPHandler class can look like

import java.util.Collections;
import java.util.Set;

import javax.xml.namespace.QName;
import javax.xml.soap.SOAPException;
import javax.xml.ws.handler.MessageContext;
import javax.xml.ws.handler.soap.SOAPHandler;
import javax.xml.ws.handler.soap.SOAPMessageContext;

public class CalculatorSOAPHandler implements SOAPHandler<SOAPMessageContext> {
    public Set<QName> getHeaders() {
        return Collections.emptySet();
    }

    public boolean handleMessage(SOAPMessageContext messageContext) {
                Boolean outboundProperty = (Boolean)
            messageContext.get (MessageContext.MESSAGE_OUTBOUND_PROPERTY);

        if (outboundProperty.booleanValue()) {
            System.out.println("Request message:");
        } else {
            System.out.println("Response message:");
        }
        
        try {
            System.out.println(messageContext.getMessage().getSOAPPart().getEnvelope().toString());
        } catch (SOAPException e) {
            e.printStackTrace();
        }


        return true;
    }

    public boolean handleFault(SOAPMessageContext messageContext) {
        return true;
    }

    public void close(MessageContext messageContext) {
    }
}


Now we need to inject this class in proxy or in other words we need to configure it with proxy so that it knows about this class. There are couple of ways to do that.
1. Specify SOAP handler while creating proxy in Proxy creating wizard.

In above diagram we are specifying a SOAP handler. We have not selected any port so handler will be registered against all web-service port. Jdev will not create any class. You must create class separately.

When we generate proxy, there is one most important class which has @WebServiceClient annotation. Above step will create a handler entry in that class as

@HandlerChain(file = "MyServiceProxy-HandlerChain.xml")

It will also create a HandlerChain.xml file, which will have entry of handler.
<ns0:handler-chains xmlns:ns0="http://java.sun.com/xml/ns/javaee">
    <ns0:handler-chain>
        <ns0:service-name-pattern xmlns:ns1="http://xmlns.oracle.com/SIH/SIHParentProcess/BPELParentProcess">ns1:bpelparentprocess_client_ep</ns0:service-name-pattern>
        <ns0:handler>
            <ns0:handler-name>CalculatorSOAPHandler</ns0:handler-name>
            <ns0:handler-class>com.san.wsproxy.client.CalculatorSOAPHandler</ns0:handler-class>
        </ns0:handler>
    </ns0:handler-chain>
</ns0:handler-chains>


Now when you run service you will see that handleMessage method of SOAP handler is getting called and its printing SOAP header and body.

Another way to associate SOAP handler class with proxy is simply modify client code.
2. With proxy generation you get a client class. It has a main method, which shows how to run a webservice. You can use this class to add security (WS-Security) header in soap message by setting OWSM policy. Similarly you can use this class also to associate handler with proxy.

Your client method would look something like

    public static void main(String[] args) {
        Calculator calculator = new Calculator();
        CalculatorSoap calculatorSoap = calculator.getCalculatorSoap();
        // Add your code to call the desired methods.
       
        Binding binding = ((BindingProvider)calculatorSoap).getBinding();
        List handlerList = binding.getHandlerChain();
        handlerList.add(new CalculatorSOAPHandler());
        binding.setHandlerChain(handlerList);
             
             
        System.out.println(calculatorSoap.add(5, 6));
       
    }

Thats all, Now if you run service, you will see that SOAP messages are getting printed on console.


Below is the print of messages
Calling handleMessage
<env:Header xmlns:env="http://schemas.xmlsoap.org/soap/envelope/"/>

<S:Body xmlns:S="http://schemas.xmlsoap.org/soap/envelope/">
  <Add xmlns="http://tempuri.org/">
    <intA>5</intA>
    <intB>6</intB>
  </Add>
</S:Body>

Calling handleMessage
<env:Header xmlns:env="http://schemas.xmlsoap.org/soap/envelope/"/>

<soap:Body xmlns:soap="http://schemas.xmlsoap.org/soap/envelope/">
  <AddResponse xmlns="http://tempuri.org/">
    <AddResult>11</AddResult>
  </AddResponse>
</soap:Body>


Instead system.out.println, you can add ADF logger also to print messages. In that case your messages would appear in weblogic log as well.

Monday, February 19, 2018

Oracle JET: Bookmark a secured pages

Problem Description: Oracle JET allows us to create SinglePage application (SPA). It changes url when we navigate between pages. What if application is secured application and pages require login to visit. In such case if we book mark a page and later try to launch it, application should verify if user is already logged in, If not redirect user to login page and once logged in user should be shown same page, which he has requested. In this blog we are trying to achieve it.

Also if user has directly started from login page then if login is successful we need to take him to default page mentioned in router configuration.

Solution:
 To implement this we need to achieve following flow

Here are the steps to achieve above flow

1. User can either launch login page or a secured page (say Page-X). If user launches login page, we can directly show him login page, but if he launches Page-X, we need to verify if user is already logged in.To verify if user has already logged in depends on server side logic.
   Here in this blog I assume there is a REST service available, which returns profile of logged in user (myprofile service). we will call this service, without passing any Authorization header. In such case browser will pass SESSIONID from cookie if user is already logged in. If not logged in then we will get 401 from server. If we get error from server, we can redirect user to login page, but we will add current url in login page url additionally, so that we can use it later to redirect user back to Page-X. Here is the common code checkIfLoginDone function written in appcontroller.js

     function ControllerViewModel() {
        $.ajaxSetup({
          xhrFields: {
            withCredentials: true
          }
        }); 

        var self = this;
        self.baseURL='http://localhost:7101';
        self.serviceContextRoot = '/myapp';
        self.serviceInitialURL = self.baseURL + self.serviceContextRoot + '/resources';

        self.router = oj.Router.rootInstance;
        self.checkIfLoginDone = function checkIfLoginDone(){
          console.log('starting login check');
          
          var promise = $.ajax({
             type: "GET",
             url: self.serviceInitialURL+ "/v1/myprofile",
             contentType: "application/json; charset=utf-8",
             crossDomain: true,
             dataType: "json"});
           
            promise.then(function(response) {


              }, function(error) {
                 // error handler
                 var currenturl = window.location.pathname + window.location.search ;
                window.location.href = '/?root=login&origurl='+currenturl;
              });

            return promise;
         
          
        }

In above code if we get error from server, we will be redirecting user to login page and add url of secured page as a parameter origurl. Login page url will appear like
http://<host>:<port>/?root=login&origurl=<url-path-of-secured-page>

[Assuming that login will be router state for login page]

2. To perform login check we can it checkIfLoginDone from all secured pages's ViewModel as
define(['ojs/ojcore', 'knockout', 'jquery', 'appController'],
 function(oj, ko, $, app) {
      self.handleActivated = function(info) {
        // Implement if needed
        return app.checkIfLoginDone();
      };

3. Create a login page: For this you can follow below steps
      a. Create login.html in js/views directory. Content could be
         

      <div class="oj-hybrid-padding">
        <h1>Login Content Area</h1>
          <div id="sampleDemo" style="" class="demo-container">
            <div id="componentDemoContent" style="width: 1px; min-width: 100%;">
              <div id="form-container" class="oj-form-layout">
                <div class="oj-form">
                  <div class="oj-flex">  
                    <div class="oj-flex-item">
                      <oj-label show-required for="username">User Name</oj-label>
                      <oj-input-text id="username" required value="{{username}}"></oj-input-text>
                    </div>
                  </div>
                  <div class="oj-flex">  
                    <div class="oj-flex-item">
                      <oj-label for="password" show-required>Passward</oj-label>
                      <oj-input-password id="password" required value="{{password}}"></oj-input-password>
                    </div>
                  </div>
                </div>
                <oj-button id='submit' on-click='[[doLogin]]'>Login</oj-button>
              </div>              
            </div>
    </div>
  </div>
   
In above page, we have created two fields username/password and a button Login.
Username and password are bound to ViewModel and Login button click calls doLogin method of ViewModel

    b. Create login.js as a ViewModel in js/viewModels directory. Its code would be

define(['ojs/ojcore', 'knockout', 'jquery', 'appController','ojs/ojknockout','ojs/ojlabel','ojs/ojinputtext', 'ojs/ojcheckboxset'],
 function(oj, ko, $, app) {
  
    function LoginViewModel() {
      var self = this;
      function param(name) {
            return (location.search.split(name + '=')[1] || '').split('&')[0];
        }
      self.username = ko.observable("");
      self.password = ko.observable("");
      self.doLogin = function doLogin(event){
        $("body").css("cursor", "wait");
       //do server login here
       var string = self.username() + ':' + self.password();
      var encodedString = 'Basic ' + btoa(string);
             
      var promise = $.ajax({
              type: "POST",
              url: app.serviceInitialURL + '/v1/auth/login',
              contentType: "application/json; charset=utf-8",
              headers: {
                   "Content-Type": "text/plain",
                    "Authorization": encodedString
              },
              crossDomain: true,
              dataType: "json"});
         
      promise.then(function(response){
              var origurl = param('origurl');
              if(origurl){
                window.location.href = origurl;
              }
              else{
                oj.Router.rootInstance.go('dashboard');
              }

              $("body").css("cursor", "default");
         }, function(response){
             //write logic here to show error message to end user.
         }) ;   

      }
      // Header Config
      self.headerConfig = {'viewName': 'header', 'viewModelFactory': app.getHeaderModel()};


    return new LoginViewModel();
  }
);

Important piece of above code is 
    i. username/password created as ko observable.
   ii. username password is used to create base 64 encoded authorization string
  iii. server side login using $.ajax POST request
   iv. If login is success then verify if there is any url parameter as origurl present. Navigate to the location whereever origurl points to. If not specified then get default page from router and navigate there. 

c. register login page in router configuration

self.router.configure({
          'login': {label: 'Login'},
         'dashboard': {label: 'Dashboard', isDefault: true},
         'incidents': {label: 'Incidents'},
         'customers': {label: 'Customers'},
         'profile': {label: 'Profile'},
         'about': {label: 'About'}
        });

4. Finally we need a logout button. We can keep it in header.html
<div class="oj-flex-bar-end">
    <oj-button id='button1' on-click="[[logout]]">Logout</oj-button>
</div>

logout implementation is written in appcontroller.js by changing getHeaderModel method.
 self.logout = function(event){
           $.ajax({
                 type: "GET",
                 url: self.serviceInitialURL+ "/v1/auth/logout",
                 contentType: "application/json; charset=utf-8",
                 crossDomain: true,
                 dataType: "json",
                 success: function (data, status, jqXHR) {
                        oj.Router.rootInstance.go('login');
                 },

                 error: function (jqXHR, status) {
                     // error handler
                     
                 }
              });

      }


 self.getHeaderModel = function() {
          var headerFactory = {
            createViewModel: function(params, valueAccessor) {
              var model =  {
                pageTitle: self.router.currentState().label,
                handleBindingsApplied: function(info) {
                  // Adjust content padding after header bindings have been applied
                  self.adjustContentPadding();
                },
                toggleDrawer: self.toggleDrawer,
                logout: self.logout
              };
              return Promise.resolve(model);
            }
          }
          return headerFactory;
        }

Above logout method calls server side logout and then redirect user to login page.